SimpleWriteAccessController Deployment: Difference between revisions
From Chainlink Community Wiki
(Created page with "test") |
No edit summary |
||
| Line 1: | Line 1: | ||
The purpose of this page is to provide highly detailed instructions on how to deploy the SimpleWriteAccessController. | |||
If you're here to deploy your own OCR Aggregator, be sure to keep track of which SimpleWriteAccessController you want to use for each purpose. | |||
== Deploying the SimpleWriteAccessController Via Remix == | |||
=== '''Import the Contract into Remix''' === | |||
Navigate to remix.ethereum.org | |||
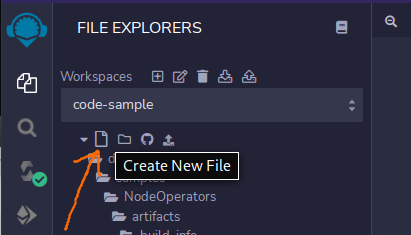
Once there, create a new doc by clicking on the little page icon | |||
[[File:NewRemixProject.png|frameless|411x411px]] | |||
Once you have an empty doc, paste in the below referenece | |||
// SPDX-License-Identifier: MIT | |||
pragma solidity 0.8.0; | |||
import "@chainlink/contracts/src/v0.8/SimpleWriteAccessController.sol"; | |||
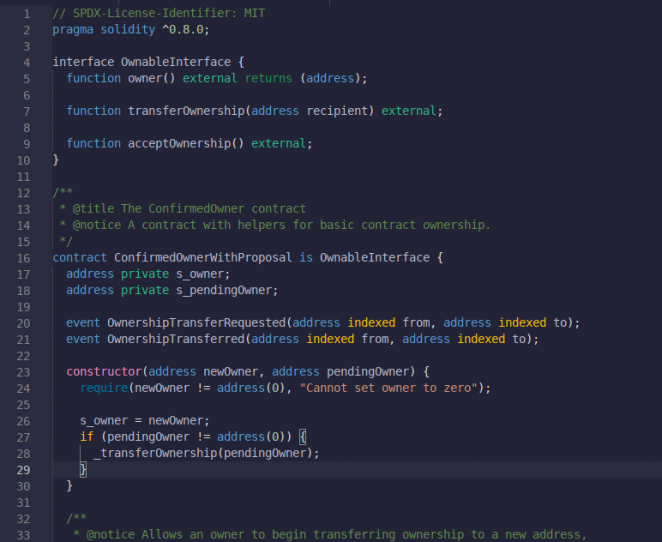
It should look like the below image: | |||
[[File:ImportedSimpleWriteAccessController.png|frameless|662x662px]] | |||
With the contract imported into remix, We'll need to compile it | |||
---- | |||
=== '''Compile the Contract''' === | |||
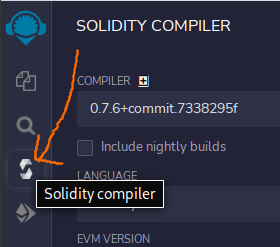
Once Pasted into Remix, navigate to the Compile page. | |||
[[File:NavigateToCompile.png|frameless]] | |||
In the image above, you can see that the COMPILER version is <code>0.7.6+...</code> | |||
When deploying the <code>SimpleWriteAccessController.sol</code> contract, we want to be sure that the version selected here is <code>'''0.8.0+commit.c7dfd78e'''</code> | |||
With the correct version selected, go ahead and compile the contract by clicking the blue button with the circular arrows | |||
[[File:RemixCompileButton.png|frameless]] | |||
Once that succeeds, we can then deploy the contract. | |||
---- | |||
=== '''Deploy the Contract''' === | |||
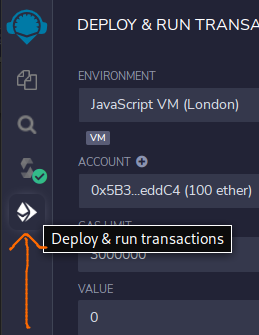
With the contract compiled, we then need to navigate to the Deplo & run transactions tab | |||
[[File:DeployContractPage.png|frameless]] | |||
Once here, we want to be sure to adjust a couple things before deploying the contract. | |||
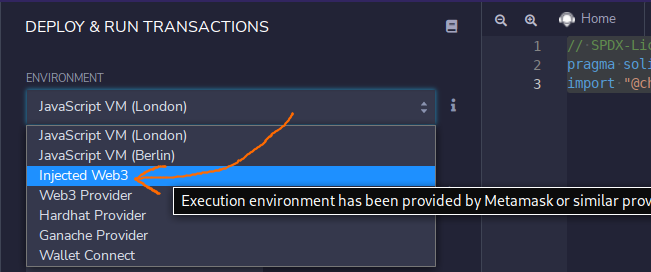
First, assuming we are deploying this contract via metamask we want to change the ENVIRONMENT to <code>'''Injected Web3'''</code> | |||
[[File:ChangeDeploymentEnvironment.png|frameless|651x651px]] | |||
The last thing we need to do before deploying the contract is change the CONTRACT we're actually deploying. | |||
Just click the drop down and select <code>SimpleWriteAccessController</code> | |||
[[File:SelectSimpleWriteAccessController.png|frameless|742x742px]] | |||
Next we just click the Orange deploy button! | |||
[[File:DeployButton.png|frameless]] | |||
---- | |||
=== '''Interacting With Deployed Contract''' === | |||
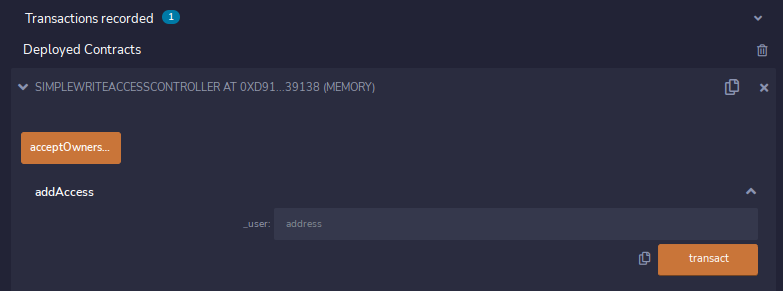
If you want to add a specific address or addresses to the to the SimpleWriteAccessController, we can drop down the addAccess section and paste in the desired address(es). | |||
Once you've done that, click the transact button | |||
[[File:AddAccess.png|frameless|783x783px]] | |||
Revision as of 21:07, 27 May 2022
The purpose of this page is to provide highly detailed instructions on how to deploy the SimpleWriteAccessController.
If you're here to deploy your own OCR Aggregator, be sure to keep track of which SimpleWriteAccessController you want to use for each purpose.
Deploying the SimpleWriteAccessController Via Remix
Import the Contract into Remix
Navigate to remix.ethereum.org
Once there, create a new doc by clicking on the little page icon
Once you have an empty doc, paste in the below referenece
// SPDX-License-Identifier: MIT
pragma solidity 0.8.0;
import "@chainlink/contracts/src/v0.8/SimpleWriteAccessController.sol";
It should look like the below image:
With the contract imported into remix, We'll need to compile it
Compile the Contract
Once Pasted into Remix, navigate to the Compile page.
In the image above, you can see that the COMPILER version is 0.7.6+...
When deploying the SimpleWriteAccessController.sol contract, we want to be sure that the version selected here is 0.8.0+commit.c7dfd78e
With the correct version selected, go ahead and compile the contract by clicking the blue button with the circular arrows
Once that succeeds, we can then deploy the contract.
Deploy the Contract
With the contract compiled, we then need to navigate to the Deplo & run transactions tab
Once here, we want to be sure to adjust a couple things before deploying the contract.
First, assuming we are deploying this contract via metamask we want to change the ENVIRONMENT to Injected Web3
The last thing we need to do before deploying the contract is change the CONTRACT we're actually deploying.
Just click the drop down and select SimpleWriteAccessController
Next we just click the Orange deploy button!
Interacting With Deployed Contract
If you want to add a specific address or addresses to the to the SimpleWriteAccessController, we can drop down the addAccess section and paste in the desired address(es).
Once you've done that, click the transact button

